开发环境
本地主机:X86的VMware虚拟机,Ubuntu18.04系统
远程主机:ARM64的开发板,型号为Toybrick3399 PRO_X,Debian10 系统
两者的GDB版本都为9.2,关于如何升级/降级/安装GDB,请参考前面的文章。GDB版本不一致会导致Remote side has terminated connection 错误。
前置步骤(自行解决)
- 安装Eclipse
- 安装GDB
- 安装multiarch
- 两台主机处于同一个网络,并且可以SSH连接。
第一步:创建C++项目
在Eclipse中创建一个C++项目,Project type选择 Execute Project下的Empty Project, Toolchain选择Cross GCC。
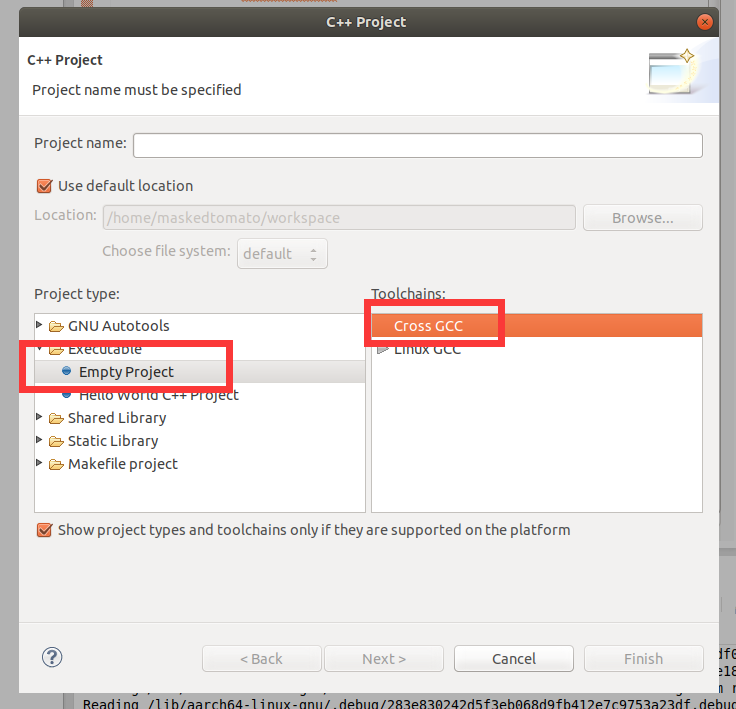
点击下一步后勾选DEBUG和Release。
Cross compiler prefix选择aarch64-linux-gun-(如果前面有做交叉编译,这个包应该已经安装好了。否则应该自行安装)
path选择/usr/bin

完成后创建一个source file,这里以一个简单的hello world举例。
* test.cpp

#include <iostream>
#include <stdio.h>
#include <stdlib.h>

int main(void)
{
	int x = 10;
    char message[] = {"Hello World!"};

    printf("X- %d, Message - %s\n", x, message);
    return EXIT_SUCCESS;
}
然后点击上方Project->Build Project.
第二步:修改调试的设置
2.1 从Eclipse的顶部,Run->Debug Configurations… 进入设置。
选择C/C++ Remote Application,新建配置。一般来说C、C++ Application与Project的名字是自动填入并且正确的。
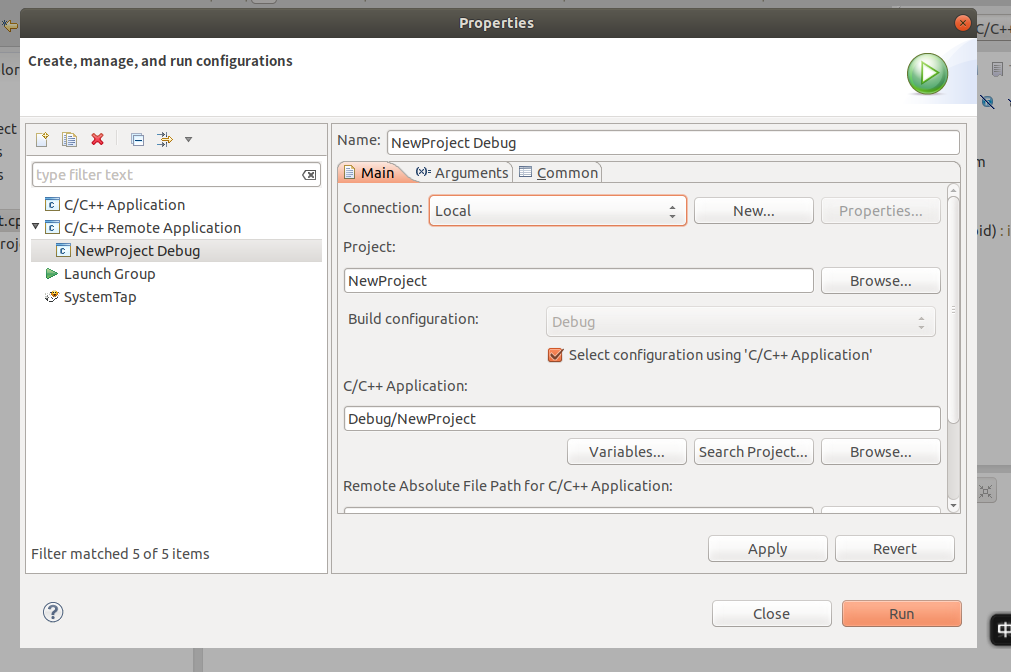
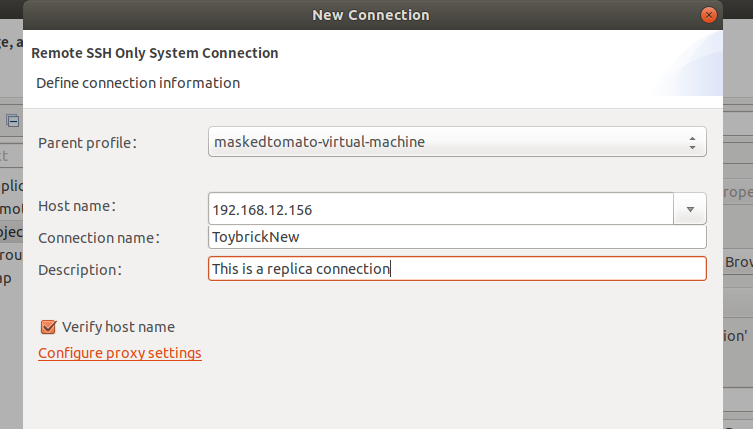
2.2 点击上图的New,创建新的SSH Only连接
Hostname为远程主机的IP地址,其他名字随意。一路下一步完成。
输入远程主机的ID与密码创建SSH连接。
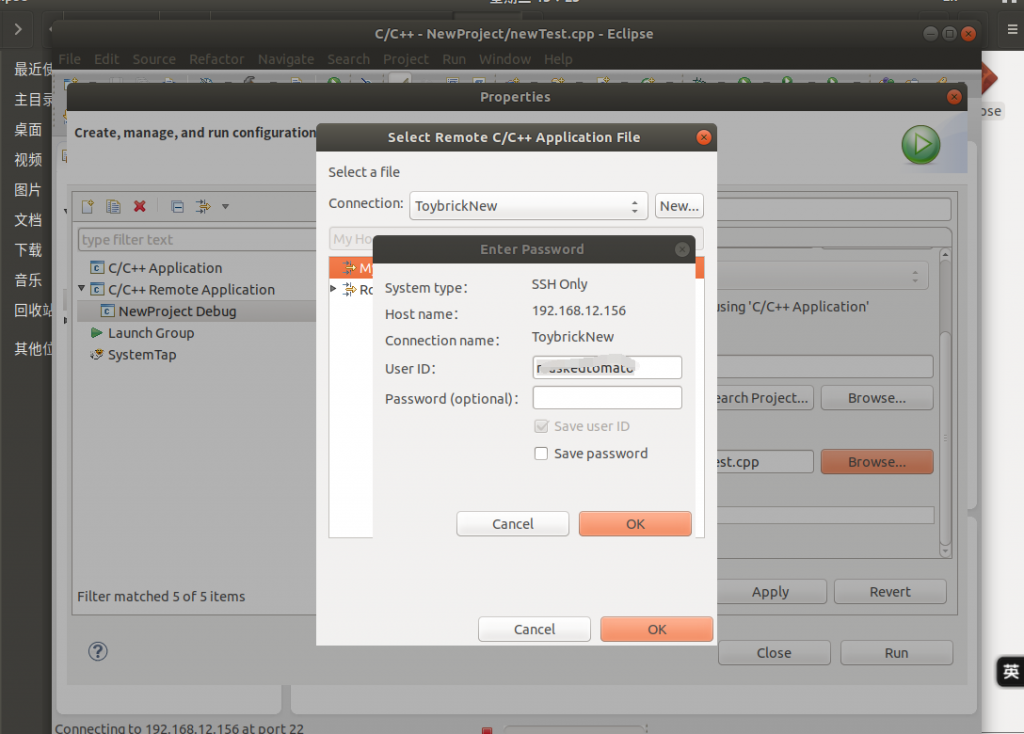
2.3 回到设置Main界面,Remote Absolute File Path,选择远程主机上的位置。
一定要写出编译后的Binary文件的文件名!!!Eclipse会将编译好的文件拷贝过去。
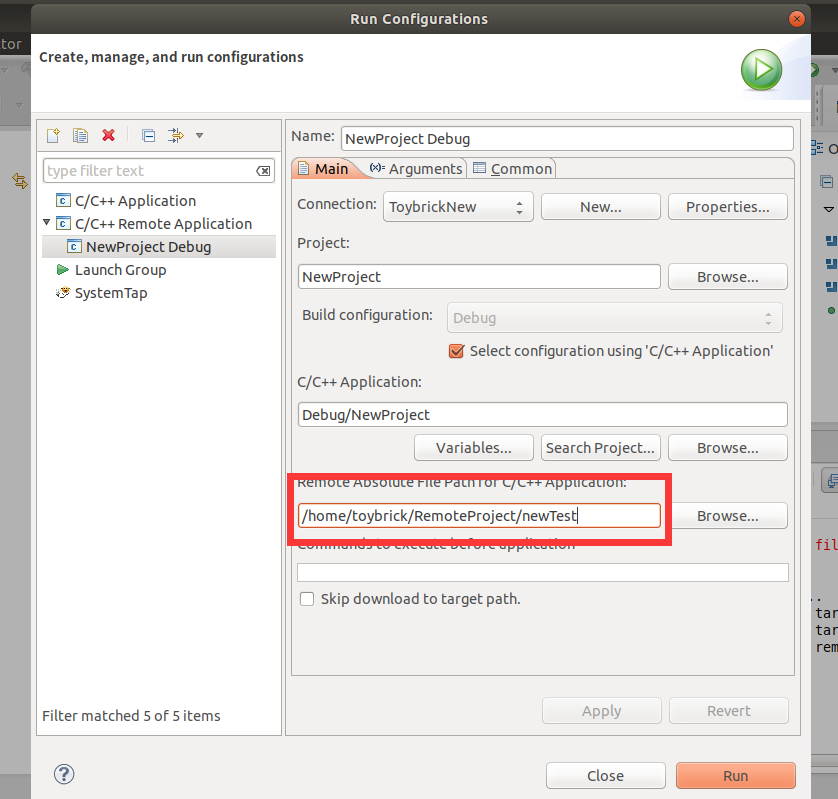
*【可选】在Commands to execute before applicatoin选项内,使用chmod 777运行你的程序。路径就是上面Remote Absolute Path的路径
chmod 777 /home/toybrick/RemoteProjoect/newTest然后选择Common选项卡,勾选Debug与Run。
第三步:连接并开始远程调试
点击运行,就可以远程调试啦!

==============================此为Manual 调试方法后续==================================
*此方法对应第二步应把连接方式改为手动。
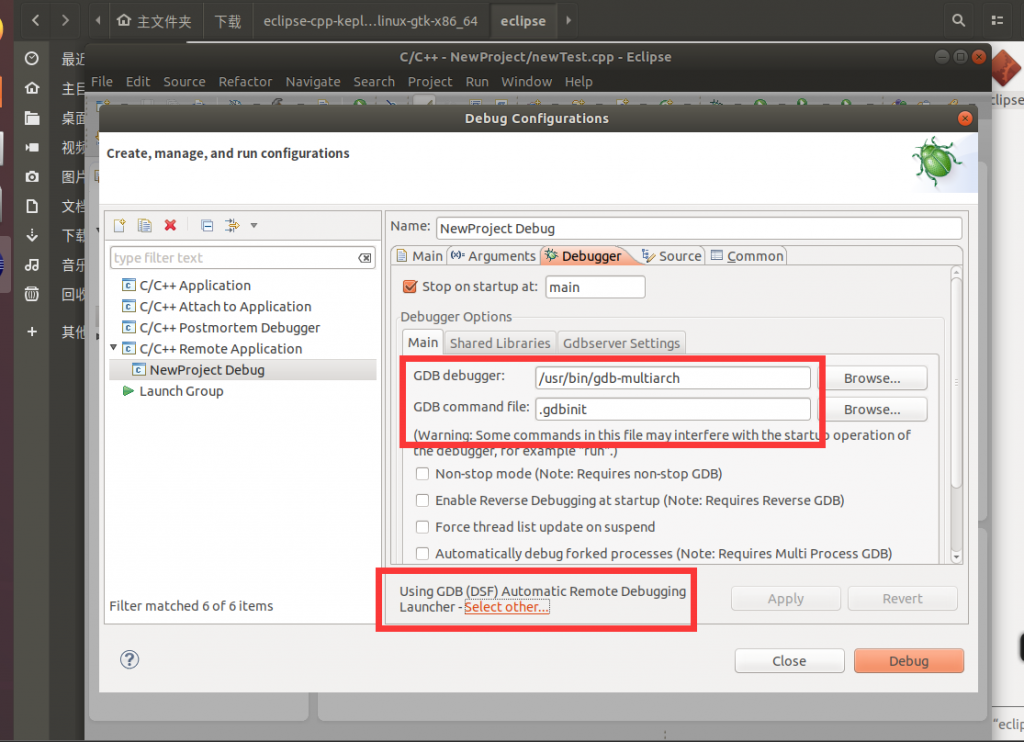
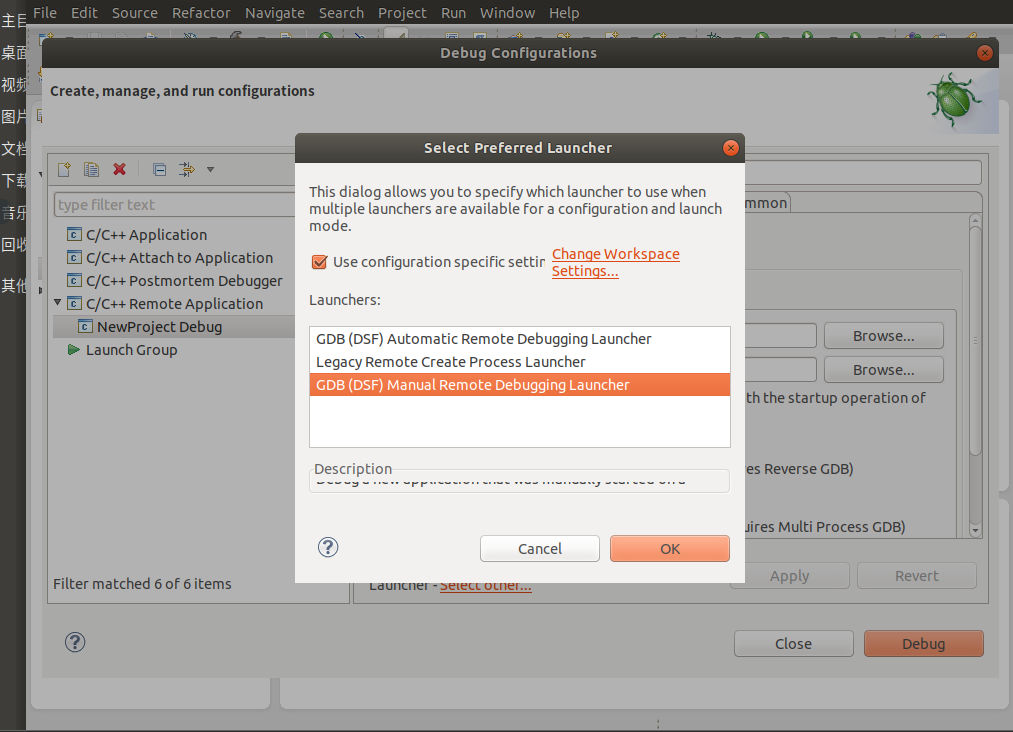
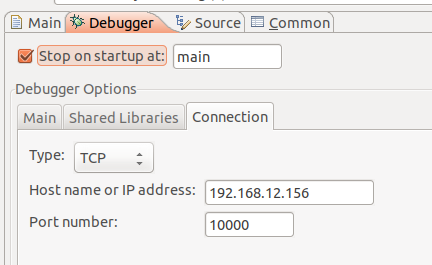
在远程主机上运行 gdbserver,后面的port号为之前设置的port号,名字为主程序的名字。
gdbserver :10000 test
然后在本地端,运行debug。
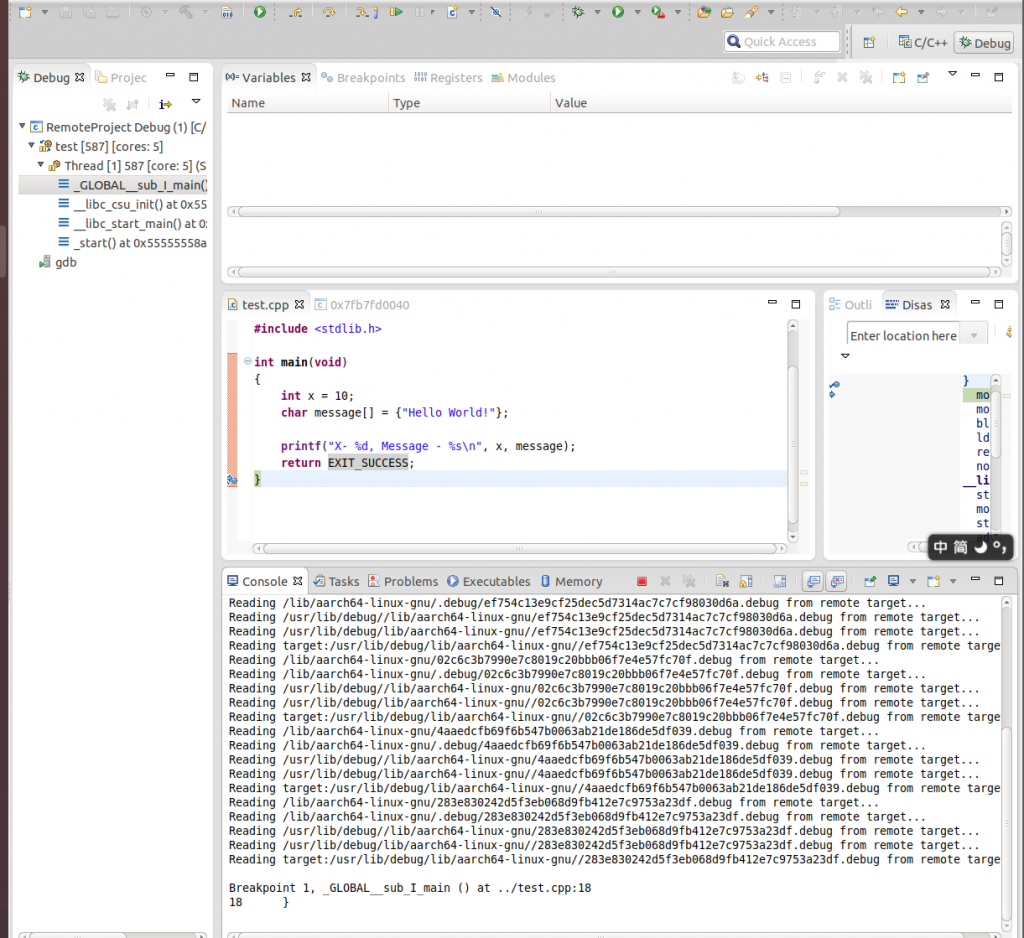
一路F8,直到程序运行结束。可以看到在远程主机上,成功输出。

参考:
Eclipse remote development and debugging
https://www.96boards.org/blog/eclipse-remote-development-debugging/
嵌入式Linux-Eclipse下gdb调试arm开发板
https://blog.csdn.net/Meteor_s/article/details/84530073
【Linux】利用eclipse远程调试目标板程序
https://blog.csdn.net/spiremoon/article/details/105954249
Remote Debugging On The Raspberry Pi
https://www.youtube.com/watch?v=foAKwizQTak&t=611s
如何使用Eclipse构建树莓派远程调试环境
https://www.yisu.com/zixun/591637.html


文章评论